Photographing clothing is a little different from shooting other kinds of products. If you’re shooting necklaces or earrings, the required materials are fairly simple. These two items are much more sturdy and sometimes easier to set up. Prepping clothing for product photography requires some basic tools that will make the job easier. In fact photographing clothing can be quite difficult without these tools. So, without further ado here are our list of basic but oh so necessary tools for prepping clothing for a product photography session.
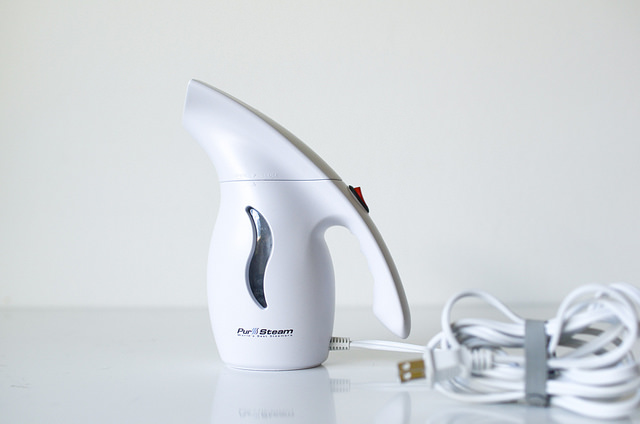
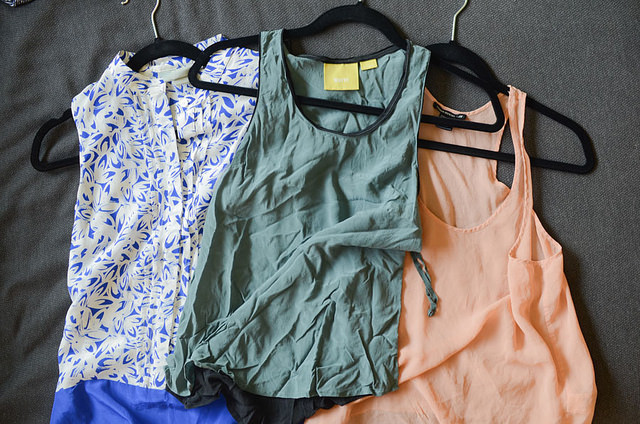 No one likes the look of wrinkled clothing. It’s unattractive and suggests the clothes are dirty. Always steam or press your clothing using an iron before a product photography session. Your clothes need to be runway ready. I mean sure you could spend hours in post-processing patch healing all the wrinkles but why waste time? Place the clothing on a hanger or a mannequin and work carefully to remove all wrinkles. If you use a piece of tinfoil placed behind the clothing, it will make the steam more effective. You want to remove all fold marks. You should also think about using a pressing cloth to help prevent fabric shine.
List of recommended steamers we love to use for our clothing shoots:
No one likes the look of wrinkled clothing. It’s unattractive and suggests the clothes are dirty. Always steam or press your clothing using an iron before a product photography session. Your clothes need to be runway ready. I mean sure you could spend hours in post-processing patch healing all the wrinkles but why waste time? Place the clothing on a hanger or a mannequin and work carefully to remove all wrinkles. If you use a piece of tinfoil placed behind the clothing, it will make the steam more effective. You want to remove all fold marks. You should also think about using a pressing cloth to help prevent fabric shine.
List of recommended steamers we love to use for our clothing shoots:
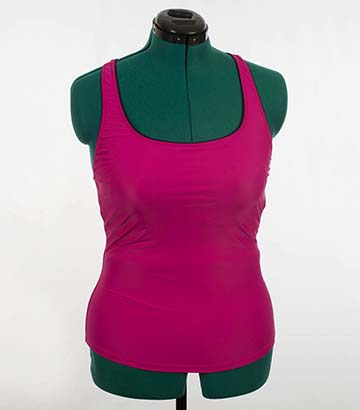
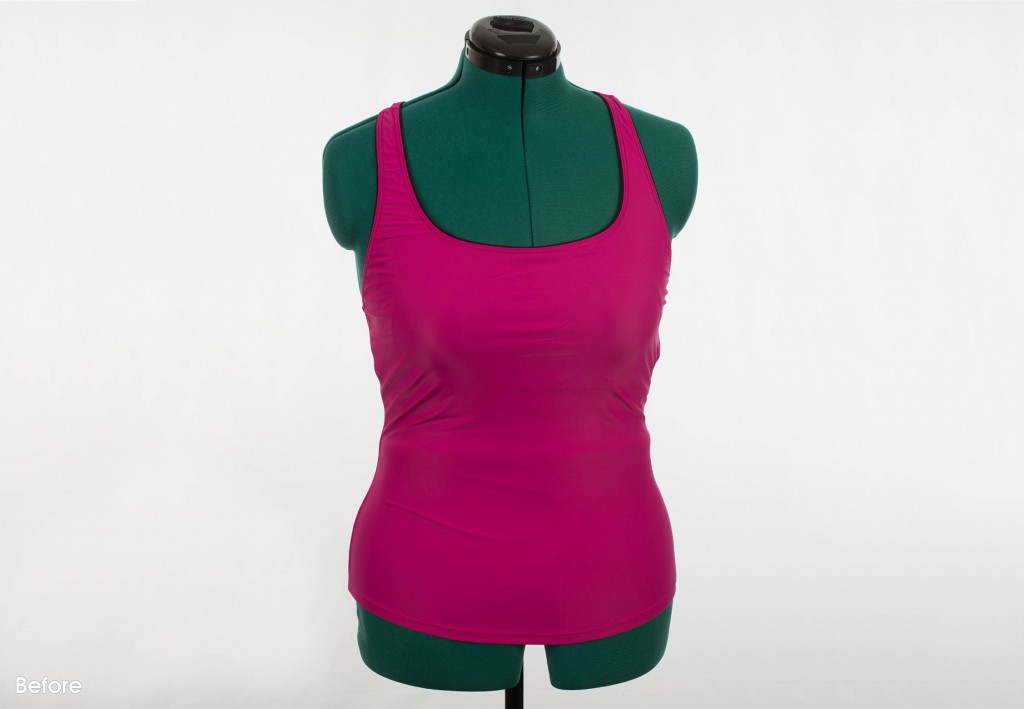 You need to position your clothing within your studio set-up carefully. How you arrange the clothing will affect how appealing it is to your customers. Make sure to use clips to tighten, tuck and contour products on a mannequin or board.
Show the shape of the clothing as it might sit on an actual human. Unless the piece is meant to hang off the shoulder and billow around then make sure the clothing is positioned so it properly fits the mannequin. The clothing should not bulge unattractively on your mannequin. The same rule applies if you are using a board to display the clothing. Make sure to arrange each shirt or tank top on the board neatly. Use as many pins as you need there’s no such thing as too many.
List of recommended pins and clamps:
You need to position your clothing within your studio set-up carefully. How you arrange the clothing will affect how appealing it is to your customers. Make sure to use clips to tighten, tuck and contour products on a mannequin or board.
Show the shape of the clothing as it might sit on an actual human. Unless the piece is meant to hang off the shoulder and billow around then make sure the clothing is positioned so it properly fits the mannequin. The clothing should not bulge unattractively on your mannequin. The same rule applies if you are using a board to display the clothing. Make sure to arrange each shirt or tank top on the board neatly. Use as many pins as you need there’s no such thing as too many.
List of recommended pins and clamps:
1) Tools to remove wrinkles from clothes
No one likes the look of wrinkled clothing. It’s unattractive and suggests the clothes are dirty. Always steam or press your clothing using an iron before a product photography session. Your clothes need to be runway ready. I mean sure you could spend hours in post-processing patch healing all the wrinkles but why waste time? Place the clothing on a hanger or a mannequin and work carefully to remove all wrinkles. If you use a piece of tinfoil placed behind the clothing, it will make the steam more effective. You want to remove all fold marks. You should also think about using a pressing cloth to help prevent fabric shine.
List of recommended steamers we love to use for our clothing shoots:
2) Clothing Positioning Tools
 You need to position your clothing within your studio set-up carefully. How you arrange the clothing will affect how appealing it is to your customers. Make sure to use clips to tighten, tuck and contour products on a mannequin or board.
Show the shape of the clothing as it might sit on an actual human. Unless the piece is meant to hang off the shoulder and billow around then make sure the clothing is positioned so it properly fits the mannequin. The clothing should not bulge unattractively on your mannequin. The same rule applies if you are using a board to display the clothing. Make sure to arrange each shirt or tank top on the board neatly. Use as many pins as you need there’s no such thing as too many.
List of recommended pins and clamps:
You need to position your clothing within your studio set-up carefully. How you arrange the clothing will affect how appealing it is to your customers. Make sure to use clips to tighten, tuck and contour products on a mannequin or board.
Show the shape of the clothing as it might sit on an actual human. Unless the piece is meant to hang off the shoulder and billow around then make sure the clothing is positioned so it properly fits the mannequin. The clothing should not bulge unattractively on your mannequin. The same rule applies if you are using a board to display the clothing. Make sure to arrange each shirt or tank top on the board neatly. Use as many pins as you need there’s no such thing as too many.
List of recommended pins and clamps:
3) Tacking Items
Once the items have been position snuggly, it’s important to make sure nothing moves around. This is especially important if you are positioning several pieces of clothing together. If you’ve just placed a pair of jeans on the board and now you want to add a t-shirt and accessories then remember to use tacking items that will keep the jeans in place while you add the other items. Tacking items like glue dots, white tack and removable double stick tape will hold your product in place but will not leave a residue on your clothing. Be careful to hide the tacking items as much as possible. Just a little bit is needed to hold your clothes in place. Take a look at these links they’ll take you to some examples of highly effective tacking products.4) Remove unsightly Lint
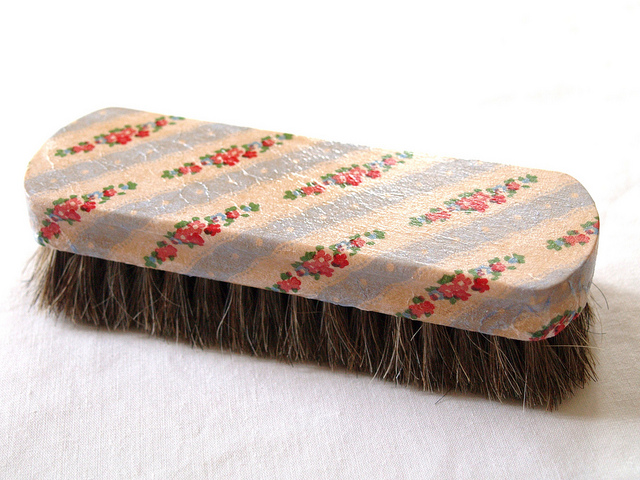
Before steaming your product, you should carefully remove all hair, dust and lint from the clothing. It’s unattractive, and if it shows up in your product shots, you will decrease the perceived value of your product. When preparing suede fabrics, use a stiff brush to arrange the material, so all of the soft hairs of the material lie in the same direction. Position your items on a mannequin or board; you can use compressed air or a commercial blower to remove lint and dust. Don’t use canned air though it has been known to leave residue behind on clothing. You don’t want weird discolorations on your products. While removing lint, is important to triple check your clothing before you finally push the down the shutter on your camera. Take a look at these products for removing lint:
5) Don’t forget the Clothing racks
You need something you can use for staging your clothing. A simple industrial rack will do the trick. Sure you can get fancy and find something more complex but remember it’s about the clothing. It should take center stage in your product photography Here’s an example of an affordable Clothing rack that suits all your needs.6) Miscellaneous Tools
Trust us you’ll be glad you’ve got these small items on hand. They will come in handy.- Scissors – don’t leave any tags or small threads showing on your clothing. Give everything a quick snip
- Satin pins to prevent damage to clothing – don’t use any old pin to position the clothing. You don’t want to ruin your product or create unsightly holes that might show up in the photograph
- Safety Pins – they are very useful for connecting buttons or repairing lost stitching. Try to keep a wide variety of sizes available in your clothing preparation kit.
- Fishing line – used in a million different ways in photography. It’s an essential item for suspending items or parts of your product. The transparent string is perfect for use in product photography.
- Soft tissue – is perfect for filling or adding bulk to fabrics. Puff up the inside of a hat or add flounce and flair to a skirt. Just be sure to use white cream paper, so it doesn’t affect the color of your clothing.
- Needle and thread kit – find a kit with multiple colors and clear thread. The kit will be handy for completing quick repairs and if you don’t have the right color use clear thread.